Skin prep, a camera-tested trial, and layered long-wear techniques deliver bridal makeup that survives an entire day of tears, dancing, and flash photography. Get the shade match right in natural light, build your face with the “setting sandwich” method pros swear by, and photograph every trial before the big day. QueenCompares has built its Ingredient Checker for exactly this decision-making, so you can confirm a product’s staying power before you buy it.
TL;DR:
Photo-testing all makeup trials ensures products look natural in flash photos and avoid unwanted flashback effects.
Building skin hydration and barrier repair routines months in advance improves foundation application and longevity.
Using the layering technique known as the setting sandwich prevents cakiness and enhances all-day wear.
Choosing waterproof or tubing mascara and layering lips with stain and cream resists tears and prolongs fresh appearance.
Conducting a full trial with natural and flash photography and practicing under bright lighting helps replicate wedding day conditions.
Table of Contents
-
Choosing Foundation and Concealer That Actually Photograph Well
-
Locking It In: The Setting Sandwich and Other Longevity Tricks
-
Cultural and Regional Bridal Makeup Traditions Worth Knowing
Top Bridal Makeup Tips Every DIY Bride Should Follow
Queens, this is your checklist. Work through it in order, and you will walk into your wedding morning with a plan instead of a panic.
-
Start skin prep months out, not days out. Hydration and barrier repair take weeks to show results, not hours. Drinking 6-7 glasses of water, eating fresh fruits and vegetables are key factors for hydration from within. Then effective skincare routine that focuses on hydration is a must.
-
Shade-match your foundation and concealer in natural daylight, then confirm the match with a flash photo. Cameras read color differently than your eyes do.
-
Photo-test every trial look. Makeup artists routinely note that cameras wash out a surprising amount of product, so what looks perfect in the mirror can look flat in pictures.
-
Layer cream products under powder, then mist to set. This buildup, often called the setting sandwich, is a technique pro artists rely on for all-day wear without a cakey finish.
-
Choose waterproof or tubing mascara and a two-step lip strategy (stain or liquid base plus a creamy topcoat) so tears and champagne toasts do not erase your look.
-
Practice under a ring light or by a bright window, and take notes each time. Consistency during rehearsal is what makes wedding morning fast instead of frantic.
Skip a step here and you are gambling on wedding morning. Follow all six, and you have a routine, not a hope.
Pre-Wedding Skin Prep: A Realistic Timeline
Foundation glides differently over hydrated, exfoliated skin than it does over flaky or congested skin, so your prep timeline matters as much as your shade choice.
-
Six months or more out: Build a basic routine of cleanser, moisturizer, and SPF, and test any bigger treatments (chemical peels, new retinoids) now, far from your wedding date. Set healthy diet rich in vitamins and minerals, collagen, protein and hydration routine.
-
Two to four weeks out: Avoid new invasive procedures or aggressive facials that could cause redness or peeling. Schedule any gentle facials on the earlier end of this window, not the week before.
-
48 to 72 hours out: Use a hydrating mask and gently exfoliate lips. Skip SPF-heavy makeup during this final stretch since certain sunscreen ingredients can cause flashback under camera flash.
Budget-conscious? A K-beauty-style layered routine using drugstore hydrating essences and sheet masks can substitute for pricier facials without sacrificing glow.
Pro Tip: Do your patch test for any new product at least two weeks before the wedding, not two days. Reactions can take that long to surface.
Choosing Foundation and Concealer That Actually Photograph Well
Flashback, the white or gray cast that shows up in photos, is one of the most common DIY bridal makeup complaints, and it is almost entirely avoidable once you know the cause.
-
Match your shade on the jawline in natural window light, then snap a flash photo to double-check before you commit to a bottle.
-
Choose a formula suited to your skin type, then build coverage in thin layers rather than one heavy pass.
-
Press, don’t buff, your setting powder into the foundation with a slightly damp sponge. This is a professional trick that locks the product in place and prevents cakiness far better than swirling a brush around.
Understanding what actually causes flashback turns a mystery photo problem into a five-minute fix.
Eyes, Lashes, and Lips: Built to Last Through Every Emotion
Your eye and lip choices need to survive happy tears, hugs, and hours of dancing, so the goal is longevity first and drama second.
-
Prime your lids, then set cream or gel shadow with a light powder press. This keeps color from creasing into your eyelid fold by hour six.
-
A soft, smudged shadow wing photographs better and lasts longer than a sharp liquid liner, and it fits the timeless, enhanced-natural direction pro artists recommend for weddings.
-
Weigh your lash options: strip lashes give dramatic length but can lift with tears, individual lashes look natural but take practice, and tubing mascara alone is often the safest DIY bet for guaranteed wear.
-
Layer your lip color: a stain or liquid lip as your base, topped with a creamy formula, resists transfer better than one product alone and avoids the dreaded veil-kiss smear.
Waterproof and tubing formulas exist specifically for days exactly like this one.
Locking It In: The Setting Sandwich and Other Longevity Tricks
Here is the exact sequence that keeps bridal makeup camera-ready from ceremony to last dance.
-
Mist first with a hydrating setting spray right after foundation, before powder touches your skin.
-
Press powder only where you actually get oily (typically the T-zone), using a damp sponge rather than a fluffy brush.
-
Mist again to melt the powder back into the skin so it looks like skin, not a mask.
Over-powdering the whole face is the fastest route to a flat, cakey look in photos, so target your zones instead of blanketing everything.
Pro Tip: Give your maid of honor a two-minute lesson on this exact sequence before the wedding. She will be your emergency backup if you need a midday refresh.
Running a Trial That Actually Predicts Wedding Day
A trial only earns its cost if you treat it like a rehearsal, not a preview.
-
Wear a top or dress that matches your actual neckline, and bring any hair accessories or veil you plan to use.
-
Take photos in natural light and with flash. Makeup artists consistently recommend this comparison because it is the only way to catch flashback or a mismatched shade before it is too late.
-
Stay in the look for three to five hours to see how it moves with oil, sweat, and expression.
-
Log what worked (products, order, timing) so wedding morning is a repeat performance, not a guessing game.
Common Bridal Makeup Mistakes to Avoid
Most DIY bridal makeup disasters trace back to the same handful of errors.
-
Piling on heavy foundation instead of building thin layers. Heavy base cracks, settles into fine lines, and reads as thick in photos.
-
Skipping the photo test entirely. Cameras interpret color and coverage differently than your bathroom mirror, and skipping this step is the single most avoidable mistake on this list.
-
Mixing incompatible formulas, like a silicone-based primer under an oil-based moisturizer. This combination frequently causes pilling, where product balls up and slides off mid-application.
Your Touch-Up Kit: What to Pack and Who Carries It
A touch-up kit only works if someone actually knows how to use it. Assign one person as the primary carrier and a second as backup, and walk your primary through a two-minute demo before the ceremony.
| Item | Purpose | Who Uses It |
|---|---|---|
| Mini pressed powder | Cuts shine without disturbing base | Bridesmaid or planner |
| Blotting papers | Fast oil control, no reapplication | Bride, anytime |
| Your exact lipstick or lip layer | Quick color refresh after eating/drinking | Bride, anytime |
| Small concealer | Spot correction under eyes | Bridesmaid |
| Spare lash + tiny scissors | Lash lift emergency | Assigned bridesmaid |
Researching Photo-Safe Products Without Overspending
Here is a real example: run a shade you are considering through QueenCompares’ Ingredient Checker to flag flashback-prone zinc or titanium content before you buy. Then use side-by-side comparisons on the Product hub to weigh two long-wear foundations on oil control and irritant risk. User reviews often surface budget dupes that match a splurge formula’s wear time at a fraction of the cost, which matters most for a DIY, budget-conscious bride.
Coordinating With Your Hairstylist for One Cohesive Look
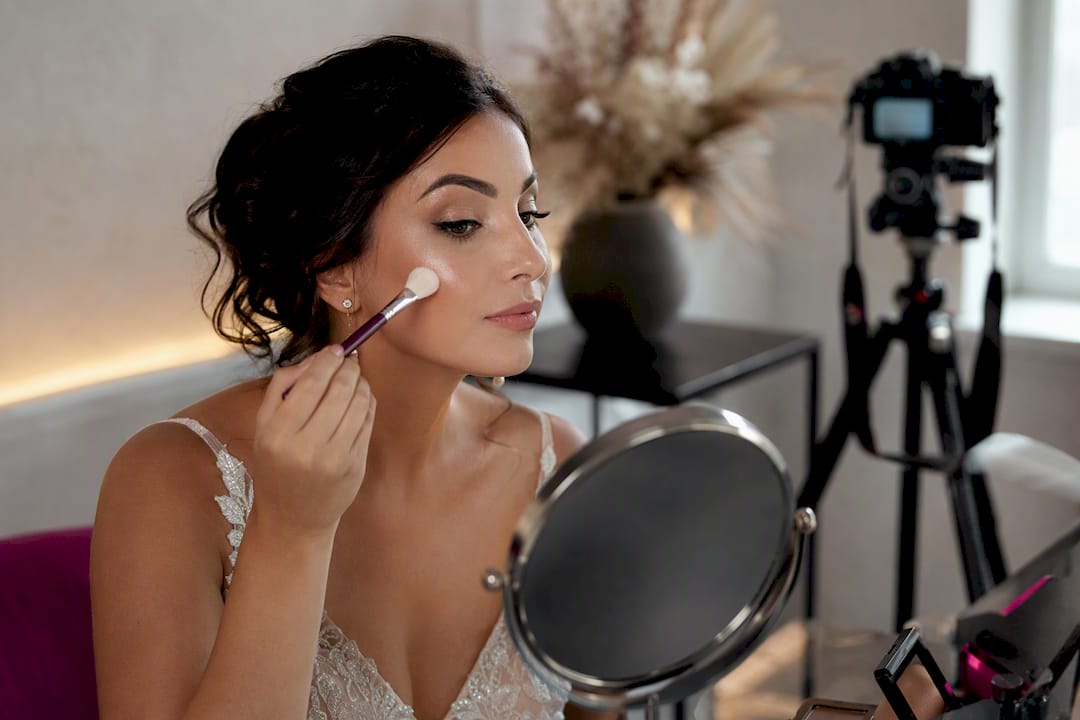
Your makeup and hair need to function as one styling plan, not two separate appointments booked back to back. Talk to your hairstylist before your makeup trial, not after, so both artists (or you, if you are doing one or both yourself) know the full picture: neckline, veil placement, and how much face the hairstyle will expose.
A low bun or slicked style puts your whole face on display, which usually calls for slightly more defined brows and a stronger lip so features do not wash out. Loose waves framing the face can soften a bolder eye look, since the hair itself adds visual texture. If a veil will sit directly on your forehead or brush your cheeks, test your foundation’s transfer resistance during the trial. Some formulas leave faint marks on tulle.
Timing matters just as much as technique. Makeup generally goes first if you are curling or heat-styling hair afterward, since stray hairspray can dull a fresh finish, but confirm this order with whoever is doing your hair. If you are managing both roles yourself, do a full dry run of the sequence, timed, so wedding morning does not turn into a scramble between two half-finished looks. Ask your hairstylist what products they use near the hairline (gels, sprays) so you can check for ingredients that might irritate skin already wearing primer and foundation.
Cultural and Regional Bridal Makeup Traditions Worth Knowing
Bridal beauty standards vary widely by culture, and borrowing thoughtfully from tradition can add meaning to your look even if your wedding is otherwise Western in style. South Asian bridal makeup often features bold, richly pigmented eyes paired with a defined lip, designed to hold up under elaborate jewelry and multi-day celebrations. Middle Eastern bridal traditions frequently emphasize dramatic, smoky eyes and flawless, luminous skin, reflecting both climate (bridal events often run late into warm evenings) and celebratory scale.
East Asian bridal makeup, particularly in Korean and Japanese wedding traditions, tends toward dewy, softly diffused skin with minimal contouring and a muted lip, a style that photographs cleanly and ages well in wedding albums decades later. Latin American bridal looks often lean into warmer, sun-kissed tones and a stronger lip color to stand out against vibrant wedding attire and outdoor ceremonies.
None of these are rules you must follow, but they are useful references if your own heritage, your partner’s, or simply your aesthetic taste points you toward a specific tradition. The throughline across all of them is intentionality: each tradition solves for its own climate, ceremony length, and cultural meaning. Borrow the logic, not just the look, and adapt product choices (heat resistance, coverage level) to your actual venue and season rather than copying a reference photo exactly.
Managing Sensitive Skin and Allergies on Your Wedding Day
Wedding day is the worst possible time to discover a new product irritates your skin, so allergy management starts weeks before your ceremony, not the morning of. Patch-test every new product, including primers, foundations, and setting sprays, on your inner arm or jawline at least 14 days out, and wear it for 24 to 48 hours before judging the result.
If you have known sensitivities to fragrance, certain preservatives, or specific active ingredients, use QueenCompares’ Ingredient Library to check full ingredient lists before your trial, not after a reaction. This matters even more if your trial and your wedding happen weeks apart, since seasonal changes in humidity or temperature can shift how your skin reacts to the same formula.
Brides with rosacea, eczema, or reactive skin often do better switching to mineral-forward formulas closer to the wedding date, since they tend to carry fewer potential irritants than heavily fragranced or alcohol-based products. If you are working with a professional artist, tell them about sensitivities in writing before the trial, and ask them to bring alternate products as backup. If you are going fully DIY, keep a backup hypoallergenic foundation and concealer in your touch-up kit in case your primary formula flares unexpectedly.
Bridal Makeup Trends Versus Timeless, Classic Looks
Bridal makeup trends shift every year, from glass skin to graphic liner to bold colored shadow, but the artists who work weddings for a living consistently steer brides toward restraint. Pro makeup artists recommend prioritizing timeless, enhanced-natural looks over avant-garde styles, and there is a practical reason behind that advice beyond taste.
Wedding photos get looked at for decades. A daring graphic liner or a heavily trend-driven lip color can look distinctly dated in ten years, while a soft, defined eye and a rosy, natural lip age gracefully in every photo from the ceremony to the reception. That does not mean trends are off-limits entirely. A subtle trend element, like a warmer bronze eye instead of a flat neutral, or a glossier lip finish instead of matte, lets you feel current without betting your entire wedding album on a look that might feel dated by your first anniversary.
The safest approach for DIY brides specifically is to build a classic base (defined skin, soft eye, natural-but-visible lip) and layer in exactly one trend element you genuinely love. That way, if the trend element does not photograph the way you hoped, your overall look still holds up.
Making Sure Your Makeup Works With Photography and Video
Still photography and video capture makeup differently, and knowing the difference changes how you build your face. Flash photography flattens color and can wash out warmth, which is why testing your exact look under a camera flash during your trial is non-negotiable rather than optional.
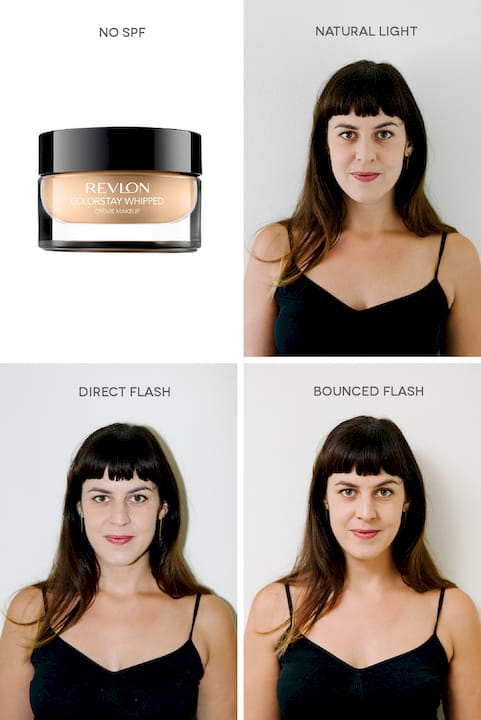
Video, especially in bright outdoor light or under harsh reception lighting, tends to exaggerate shine and texture more than a still photo does. Set your T-zone more deliberately if you know your videographer will be filming candid moments throughout the reception, and consider a slightly more matte finish overall than you might choose for daytime-only wear.
Warm-toned lighting at most receptions (string lights, candles, sunset ceremonies) shifts how cool-toned products read on camera, sometimes making a shadow or lip look muddier than it appeared in daylight. If your wedding spans both daylight and evening lighting, test your look in both conditions during your trial rather than assuming one photo test covers the whole day. A finish that photographs consistently across matte, satin, and dewy options matters more on your wedding day than it does on an average Tuesday, simply because so much of the day is documented.
A Candid Note on Practice, Perfection, and Product Research
Practice beats product-chasing every time. No highlighter fixes a foundation you tested once, the week before your wedding. Hire a professional if your skin is complex or your timeline is genuinely too tight to trial properly. Otherwise, run the reps. QueenCompares simply made narrowing down photo-safe, budget-friendly options faster than digging through scattered reviews myself.
— Magdalena Kapuscinska
Build Your Bridal Makeup Shopping List With Confidence
Skipping straight to a shopping list without checking ingredients is how brides end up with flashback surprises or pilling formulas on the morning that matters most. QueenCompares gives you a faster path than trial-and-error: run any foundation or setting spray through the Ingredient Checker to flag flashback risks before you buy, then browse the Ingredient Library if a specific compound on a label has you second-guessing a purchase.

Side-by-side comparisons on the Product page let you weigh two long-wear foundations against each other on ingredients, price, and user-reported wear time, which is exactly how budget-conscious brides find real dupes instead of guessing from an influencer recommendation. Start your bridal shopping list on QueenCompares today and check your first foundation shade before your next trial.
Where This Advice Comes From
Bridal makeup guidance in this guide draws on professional consensus from Allure on trial photo-testing, Vogue on setting techniques, The Knot on trend versus classic style choices, and Metro on flashback and formula compatibility, alongside British Vogue’s reporting on DIY bridal practice habits.
Sources
-
How to Choose Your Wedding Makeup, According to Makeup Artists | Allure
-
The Best Wedding Day Makeup Tips From Makeup Artists | Vogue
-
How to do your own wedding makeup, according to professional makeup artists | Metro News
FAQ
What are the best bridal makeup tips for a first-time DIY bride?
Prioritize skin prep weeks in advance, shade-match in natural light with a flash-photo check, and practice your full look at least twice before the wedding while logging what worked.
What are the most common bridal makeup mistakes?
The biggest mistakes are applying foundation too heavily instead of building thin layers, skipping the photo test, and mixing incompatible formulas like silicone primer under oil-based skincare, which causes pilling.
Is $300 average for professional bridal makeup?
Professional bridal makeup pricing varies widely by region, artist experience, and whether a trial is included, so there is no single standard rate; compare local artist quotes directly rather than budgeting around one figure.
What are the do’s and don’ts of bridal makeup?
Do photo-test every trial look, layer products for longevity using techniques like the setting sandwich, and choose waterproof formulas for eyes and lips; don’t skip the trial, don’t apply heavy SPF-laden makeup that risks flashback, and don’t try a brand-new product for the first time on the wedding day.