The simplest effective K-beauty skincare routine for beginners is four steps: a gentle cleanser, a hydrating toner, a moisturizer, and sunscreen (SPF 50+) every morning. In the evening, swap in a double cleanse and skip the sunscreen. That’s your foundation. Everything else builds on top of it.
Your AM starter routine:
-
Rinse or gentle cleanser
-
Hydrating toner or essence (pat in, don’t rub)
-
Moisturizer
-
Sunscreen with broad-spectrum protection applied last
Your PM starter routine:
-
Oil cleanser (dissolves SPF, makeup, sebum)
-
Low-pH water cleanser (pH 4.5–5.5 to protect your acid mantle)
-
Hydrating toner
-
Moisturizer (add a serum or active once your skin is stable)
One thing dermatologists consistently point out: most Koreans don’t do 10 steps daily. The 10-step routine is a flexible menu, not a daily mandate. Realistic everyday routines involve a few essential steps. Start there.
Table of Contents
What K-beauty skincare routine template fits you?
The three most common templates aren’t competing options. They’re stages. You start at four steps, get consistent, then expand when your skin is ready.
| Template | Steps | Time (AM/PM) | Best for |
|---|---|---|---|
| 4-step | Cleanse, toner, moisturizer, SPF | ~5 min / ~7 min | Absolute beginners, busy schedules |
| 7-step | Above + essence, serum, eye cream | ~10 minutes / ~10 minutes | After 4–6 weeks of consistent use |
| 10-step | Above + exfoliant, sheet mask, sleeping mask | ~15–20 minutes / ~15–20 minutes | Weekends or when skin needs extra care |
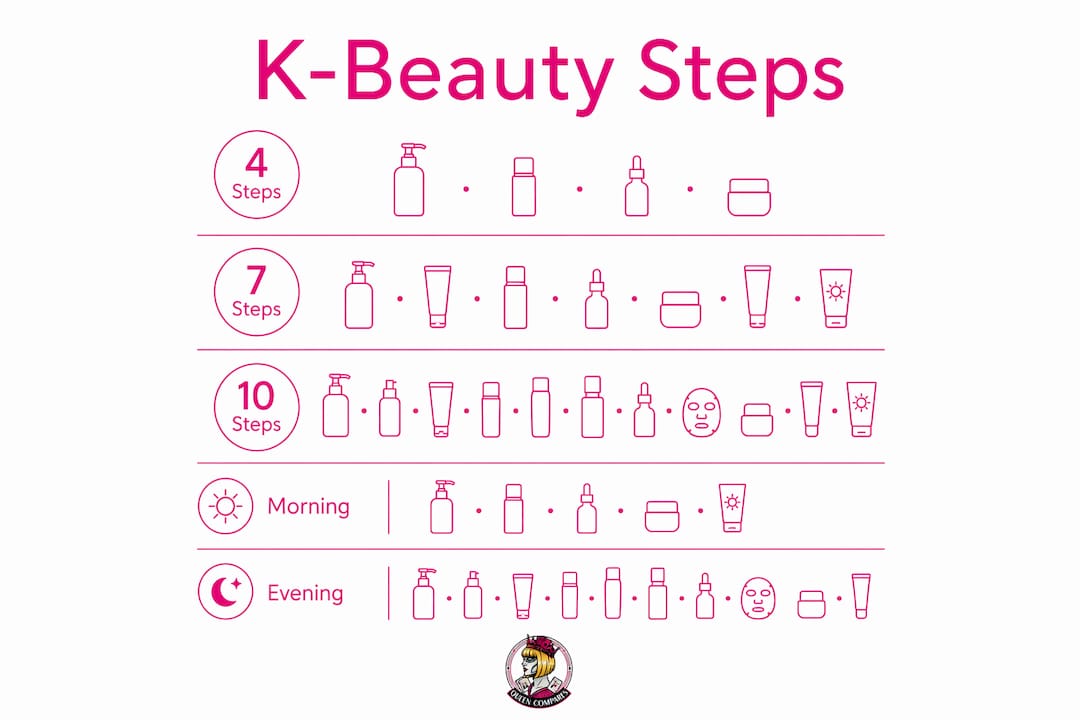
The 10-step version is genuinely useful, but not as a daily ritual. Think of it the way you’d think of a deep-clean Sunday versus your regular weekday routine. A basic 4-step routine done consistently outperforms a 10-step routine done sporadically every time.
Pro Tip: Add one new step at a time, waiting at least two weeks between additions. This way, if your skin reacts, you know exactly what caused it.
What does each step actually do, and how do you apply it?
This is where the Korean skincare regimen earns its reputation. Each step has a specific job, and the order matters because products layer from lightest to heaviest texture.
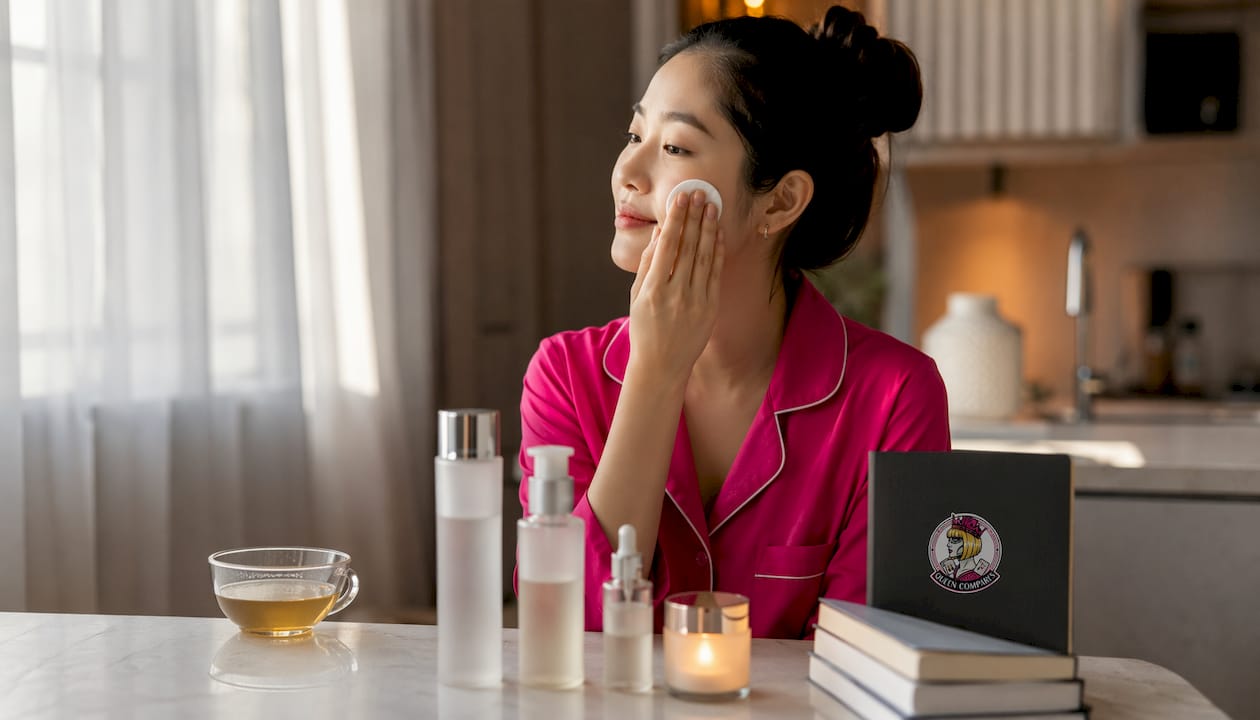
Step 1: Oil cleanser (PM only)
Oil cleansers work on the “like dissolves like” principle. Massage onto dry skin for 60 seconds to break down SPF, makeup, and excess sebum. Emulsify with a little water, then rinse. You don’t need to scrub.
Step 2: Water-based cleanser (AM and PM)
Follow the oil cleanser with a low-pH water cleanser (target pH 4.5–5.5). This removes water-based impurities like sweat and grime without stripping your acid mantle. In the morning, a quick rinse or a gentle lather is enough if you didn’t sweat overnight.
Step 3: Exfoliant used sparingly several times per week, not daily
Chemical exfoliants are the K-beauty standard. Physical scrubs are mostly out. K-beauty favors gentle chemical exfoliants at low concentrations used 2–3 times per week. AHAs (like glycolic or lactic acid) work well for dry or dull skin. BHAs (salicylic acid) penetrate pores and suit oily or acne-prone skin. PHAs are the gentlest option for sensitive skin.
Step 4: Hydrating toner
Here’s the biggest difference between K-beauty and Western skincare: Korean toners are hydrating preparatory layers, not astringents. They contain humectants like hyaluronic acid and calming ingredients like centella asiatica. Pour a small amount into your palms and press gently into skin. Don’t swipe with a cotton pad. You’re adding moisture, not removing it.
Step 5: Essence
Essences are more concentrated than toners and act as a bridge to serums. They’re lightweight, often fermented, and boost absorption of everything that follows. Pat a few drops into skin after your toner fully absorbs.
Step 6: Serum or ampoule
Serums target specific concerns: pigmentation, firmness, acne, or dullness. Ampoules are even more concentrated, typically used as a short treatment course. Apply from lightest to heaviest texture if you’re layering two. One serum is plenty when you’re starting out.
Step 7: Sheet mask (occasional)
Sheet masks deliver a concentrated dose of ingredients in 15–20 minutes. They’re not a daily necessity. Use them 1–2 times per week or whenever your skin feels depleted. After removing, pat in the remaining serum rather than rinsing.
Step 8: Eye cream
The skin around your eyes is thinner and more prone to dryness and fine lines. Apply eye cream with your ring finger using a gentle tapping motion. Use it before your moisturizer so it doesn’t have to compete with a heavier layer.
Step 9: Moisturizer
Moisturizer seals in everything you’ve layered. K-beauty moisturizers tend to be lighter than Western ones because they’re working on top of already-hydrated skin. Gel creams suit oily skin; richer creams work better for dry or compromised barriers. A sleeping mask can replace your moisturizer on nights when your skin needs extra recovery.
Step 10: Sunscreen (AM only)
Sunscreen is the final AM step and the single most evidence-backed product for preventing visible aging. Apply it after your moisturizer has absorbed, about 2–3 minutes before going outside. K-beauty sunscreens are formulated to be cosmetically pleasant and easy to use, absorbing quickly without a white cast or pilling under makeup.
Practical data reference:
| Step | Key guideline | Why it matters |
|---|---|---|
| Water cleanser pH | 4.5–5.5 | Protects acid mantle and barrier |
| Exfoliation frequency | 2–3x per week | Prevents over-exfoliation |
| Sunscreen SPF | SPF 50+ (PA+++ or higher) | Broad-spectrum UV protection |
| Sheet mask duration | 15–20 minutes | Prevents reverse osmosis (mask drying out) |
Ingredients to look for: hyaluronic acid (humectant), ceramides (barrier repair), centella asiatica (soothing), niacinamide (brightening, pore-minimizing), snail mucin (hydration and repair).
Ingredients to approach carefully as a beginner: high-fragrance formulas, denatured alcohol high on the ingredient list, high-concentration retinoids without a tolerance-building period, and AHAs above 10% without patch testing first.
How do you adapt the routine for your skin type?
The four-step base works for everyone. What changes is the product texture and the actives you add later. For skin-type-specific tips, the skincare tips for every skin type guide at QueenCompares goes deeper on product selection.
Oily skin: Use a gel or foam water cleanser, a lightweight watery toner, and a gel-cream moisturizer. BHA (salicylic acid) is your best exfoliant. Counterintuitively, oily skin still needs hydration. Skipping moisturizer signals your skin to produce more oil.
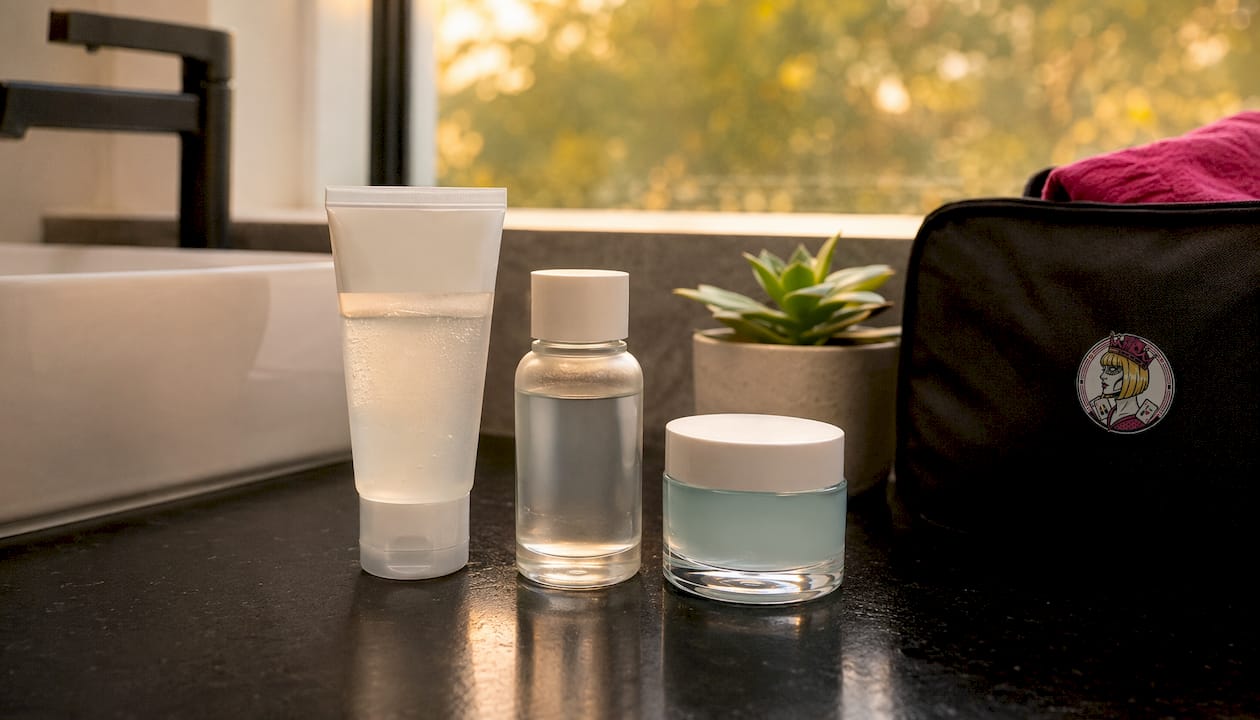
Dry skin: Layer your toner in two or three thin applications before moving on. Choose a richer cream moisturizer and look for ceramides and fatty acids. AHAs like lactic acid exfoliate gently while adding moisture. A sleeping mask 2–3 nights per week helps significantly.
Combination skin: Use a gentle, pH-balanced cleanser and apply lighter products to your T-zone, richer ones to dry patches. Niacinamide helps balance oil production without drying out the rest of your face.
Sensitive skin: Keep the ingredient list short. Prioritize fragrance-free formulas. Centella asiatica, heartleaf, and beta-glucan are your best friends. Choose PHAs over AHAs or BHAs. Introduce one new product every two weeks, minimum.
Acne-prone skin: BHA is your go-to exfoliant. Look for non-comedogenic moisturizers and avoid heavy occlusive oils. Niacinamide helps with post-acne marks. Resist the urge to over-cleanse; stripping the skin worsens breakouts.
Red flags that mean you should simplify immediately:
-
Persistent stinging or burning after applying a product
-
Worsening redness or new patches of irritation
-
Sudden increase in breakouts after adding a new step
-
Skin feeling tight and uncomfortable after cleansing
When any of these appear, strip back to the four-step base and let your barrier recover for at least one week before reintroducing anything. The skincare routine simplification checklist at QueenCompares walks you through exactly how to do that.
AM vs. PM: what actually changes between morning and night?
The morning routine is about protection. The evening routine is about repair. That single distinction explains every placement decision.
AM routine order:
-
Rinse or gentle cleanse
-
Vitamin C serum (antioxidant protection, applied to clean skin)
-
Hydrating toner or essence
-
Moisturizer
-
Sunscreen (always last, never mixed with moisturizer)
PM routine order:
-
Oil cleanser (double cleanse if you wore SPF or makeup)
-
Water-based cleanser
-
Exfoliant (2–3x per week, not every night)
-
Toner and essence
-
Retinoid or acid treatment (PM only)
-
Serum
-
Eye cream
-
Moisturizer or sleeping mask
Where actives go:
-
Vitamin C: AM, after cleansing, before moisturizer. It provides antioxidant defense against UV-generated free radicals.
-
Retinoids: PM only, after toner and essence, before moisturizer. Never mix with AHAs or BHAs on the same night when starting out.
-
AHAs/BHAs: PM, 2–3 nights per week. Apply after toner, before serum.
Sunscreen is the most crucial daily step in any AM routine. SPF 50+ with PA+++ or PA++++ rating gives you broad-spectrum UVA and UVB coverage. Apply it as the absolute final step. Mixing it into your moisturizer dilutes the SPF factor and breaks down the filter’s protective film.
Pro Tip: If sunscreen pills under makeup, let it absorb for 3–5 minutes before applying foundation. A lightweight, water-based SPF formula also helps. Check the makeup layering guide for more on layering SPF under cosmetics.
How do you introduce actives without wrecking your skin?
Actives are where most beginners go wrong. They buy a retinoid, a vitamin C, an AHA, and a BHA all at once and use them the same week. The result is irritation, a damaged barrier, and no idea which product caused it.
Here’s the safe sequence:
-
Stabilize your base routine first. Run your four-step routine consistently for 3–4 weeks. Your skin should feel hydrated and comfortable before you add anything targeted.
-
Patch test every new product. Apply a small amount to your inner arm or behind your ear for 24–48 hours. No reaction means you can proceed.
-
Introduce one active at a time. Start with the gentlest option for your concern (vitamin C for brightening, niacinamide for pores, a low-concentration AHA for texture).
-
Start at low frequency. Use a new active 1–2 times per week for the first two weeks, then increase to every other night if your skin tolerates it.
-
Wait 2–4 weeks before adding the next active. This gives you a clear read on how your skin is responding.
-
Track your skin’s response. Note texture, hydration, and any irritation in a simple notes app.
Scheduling guide:
-
Vitamin C: AM, 3–5x per week to start, then daily
-
Retinoid: PM, 1–2x per week, build slowly over 2–3 months
-
AHA/BHA: PM, 2–3x per week, never the same night as retinoid when starting
Stop and rebuild if you notice: persistent redness that doesn’t fade within an hour of application, skin that feels raw or burns with your regular moisturizer, flaking that isn’t from dryness, or new breakouts in areas that weren’t previously affected. These are signs of a compromised barrier. Pause all actives, return to your base four steps, and add a ceramide-rich moisturizer until your skin feels stable again.
For a deeper look at building a safe routine from scratch, the safe skincare routine guide at QueenCompares covers barrier repair and ingredient compatibility in detail.
How long does it take, and what will it cost?
Realistic time and budget expectations save you from both burnout and sticker shock.
Time per session:
| Routine | AM time | PM time |
|---|---|---|
| 4-step | 4–6 minutes | 6–8 minutes |
| 7-step | 8 minutes | 10 minutes |
| 10-step | 15–20 minutes | 20 minutes |
Most of that time is waiting for products to absorb, not active application. You can do your toner while your cleanser rinses, and your moisturizer while your serum sinks in.
Budget ranges for a beginner starter set (one month’s supply):
| Tier | Monthly estimate | What you get |
|---|---|---|
| Budget | $20 | Cleanser, toner, basic moisturizer, drugstore SPF |
| Mid-range | $35 | Quality versions of all four steps; mid-range Korean product sets run roughly $30–$55 per set |
| Premium | $80 | Targeted serums, premium SPF, essence, eye cream |
Where to spend and where to save:
-
Spend on sunscreen and cleanser. These two products interact with your skin most directly and most often.
-
A mid-range moisturizer outperforms a budget one for most skin types, but the difference between mid-range and premium is smaller than brands suggest.
-
Toners and essences are where you can save without sacrificing much. Many budget Korean toners perform comparably to premium ones.
Practical ways to stretch your budget:
-
Buy sample or travel sizes when trying a new product before committing to full size
-
Look for multi-use products (a toner that also functions as a light essence)
-
Shop during Korean beauty sale seasons or through US-based K-beauty retailers that stock authentic products
-
For travel-friendly versions of your routine, the skincare routine for travel guide has solid format recommendations
Why does layering actually work? What experts say
Layering hydrators isn’t just a cultural ritual. It’s a functional strategy: each layer primes the skin to absorb the next one more effectively, and a well-hydrated barrier responds to actives with less irritation.
K-beauty experts emphasize that the philosophy is about intuitive layering, choosing products by skin need, season, and tolerance rather than following a rigid checklist. That’s a meaningfully different approach from Western routines that prescribe a fixed product stack.
Alicia Yoon, esthetician and founder of Peach & Lily, explains the toner-to-essence sequence this way: “Korean toners are incredibly hydrating, and their main job is to focus on balancing the skin, including the skin’s pH level.” She describes essences as “hydrating elixirs that can also deliver lightweight treatment benefits,” distinct from toners in concentration and function.
Michelle Lee, K-beauty expert and former editor-in-chief of Allure, captures the flexibility that makes the regimen sustainable: “People who are really into Korean beauty often end up building a skin-care wardrobe. On weekends, maybe you do the mask, the ampoule, the whole routine. But on busy days, you do the abbreviated version.”
The practical takeaway: applying toner and essence before your serum isn’t redundant. A hydrated surface allows actives to penetrate more evenly and with less irritation than applying them to dry, tight skin. A hydrated, intact barrier responds better to actives and reduces the risk of over-sensitization. This is why K-beauty prioritizes hydration and barrier maintenance before introducing corrective ingredients.
The skincare layering guide at Shella Bella Beauty breaks down the science of layering order in practical terms worth reading alongside this routine.
Key Takeaways
A consistent 4-step K-beauty routine built on gentle cleansing, hydrating toner, moisturizer, and SPF 50+ daily outperforms any 10-step routine done sporadically.
| Point | Details |
|---|---|
| Start with four steps | Cleanser, hydrating toner, moisturizer, and SPF 50+ form the base every skin type needs. |
| 10-step is a menu, not a mandate | Most Koreans use a simplified 3–5 step routine daily and reserve the full 10-step version for weekends or times when their skin needs extra care. |
| Introduce actives one at a time | Patch test, start 1–2x per week, and wait 2–4 weeks before adding the next product. |
| Sunscreen is non-negotiable AM | Apply SPF 50+ (PA+++ or higher) as the final morning step, every day, regardless of weather. |
| QueenCompares helps you vet ingredients | Use the Ingredient Checker and Label Scanner to evaluate product safety before committing to a new K-beauty product. |
The honest truth about starting a Korean skincare regimen
There’s a version of K-beauty that gets sold online: 10 steps, 10 products, all from premium brands, applied in a specific sequence every single morning and night. That version is aspirational content, not practical advice.
What actually works for most beginners is far simpler. Four products, applied consistently, will do more for your skin in three months than a rotating cast of 15 products used whenever you feel motivated. The layering philosophy at the heart of Korean skincare is genuinely effective, but it works because of consistency and compatibility, not because of volume.
Start with what you’ll actually do every day. Adapt by season: your skin needs more moisture in winter and lighter textures in summer. Don’t buy everything at once. And when you’re unsure whether a new product is right for your skin, check its ingredients before you apply it. The QueenCompares Ingredient Checker is a good place to start that habit.
Check ingredients before you commit to any K-beauty product

Picking K-beauty products gets complicated fast. Ingredient lists are long, transliterated Korean names are unfamiliar, and marketing claims don’t always match what’s actually in the formula. That’s exactly the gap QueenCompares was built to close.
The Ingredient Checker lets you paste in any product’s ingredient list and get a clear safety and compatibility read instantly. The Label Scanner goes further: point your phone at a product label in-store or while shopping online, and get a breakdown of what’s in it, what each ingredient does, and whether anything conflicts with your skin type or current routine. You can save your scan reports to your profile and build a personal record of what works for your skin.
Browse the full ingredient library to research specific actives before you buy, or explore K-beauty products by brand to find formulas your community has already reviewed. This article is general information; for medical skin concerns, consult a dermatologist.
Useful sources and further reading
These are the resources used to build this guide, plus QueenCompares pages worth bookmarking as your routine grows.
-
Korean Skincare Routine for Beginners (Korea Web Magazine) — Practical philosophy-first breakdown of why K-beauty starts with barrier health before actives. Excellent for understanding the “why” behind the step order.
-
10-Step Korean Skincare Routine (Soko Glam) — The clearest visual breakdown of all 10 steps with product category explanations. Good reference for understanding what each step category includes.
-
Korean Skincare Routine Explained by a Korean Dermatologist (Jane Yoo MD) — Dermatologist-backed guidance on double cleansing, toner function, and sunscreen placement. One of the most clinically grounded sources available.
-
What Experts Really Think of the 10-Step Routine (Vogue) — Expert quotes from Alicia Yoon and Michelle Lee on how real K-beauty practitioners approach layering and routine flexibility.
-
Korean Skincare Routine Guide (Seoul Signal) — Realistic data on how Koreans actually use the 10-step system day-to-day, plus exfoliation frequency guidance.
-
QueenCompares Ingredient Library — Research individual actives and flag potential irritants before adding them to your routine.
-
K-Beauty Explained: Your 2026 Skincare Routine Guide (QueenCompares Blog) — Long-form internal guide covering K-beauty context, philosophy, and routine building in depth.
-
Skincare Ingredients: What You Need to Know (QueenCompares Blog) — Ingredient primer covering actives, humectants, and barrier-repair ingredients relevant to K-beauty routines.
-
Strengthen Your Skin Moisture Barrier (After Hours) — Partner resource focused on barrier repair and hydration, useful when your skin needs recovery after over-exfoliation.
FAQ
What is a K-beauty skincare routine?
A K-beauty skincare routine is a layered approach to skin health rooted in Korean skincare philosophy, prioritizing hydration, barrier protection, and sun care before corrective actives. It ranges from a simple 4-step daily routine to a 10-step weekend regimen, depending on your skin’s needs.
What order do you use K-beauty products in?
Apply products from thinnest to thickest texture: oil cleanser (PM), water cleanser, toner, essence, serum, eye cream, moisturizer, and sunscreen (AM only). This order maximizes absorption at each layer.
Do you really need all 10 steps every day?
No. Most Koreans use a simplified 3–5 step routine daily and reserve the full 10-step version for weekends or when skin needs extra attention. Start with four steps and expand gradually.
What are the 7 steps of a Korean skincare routine?
A practical 7-step routine includes: oil cleanser (PM), water cleanser, hydrating toner, essence, serum, moisturizer, and sunscreen (AM). This covers all the core functional layers without the optional steps like sheet masks or eye cream.
How long does a K-beauty routine take each day?
A 4-step AM routine takes roughly 4–6 minutes; the PM version runs 6–8 minutes. A 7-step routine adds about 4–6 minutes per session. Most of that time is waiting for products to absorb, not active application.